How to Make Wooden Push-Up Bars in 10 Easy Steps
“Push-ups, sit-ups, and a strict diet of raisins. That’s my plan!” – Jack Black
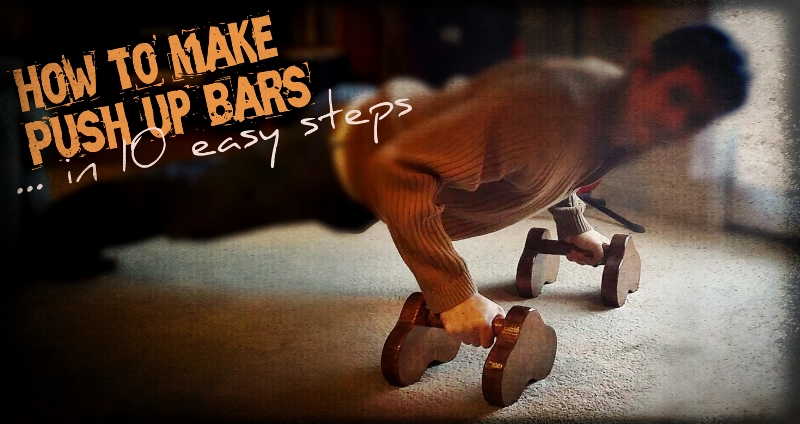
Chuck Norris and Bruce Lee walk into a bar. After ordering a round of brewskies, Chuck turns to Bruce and poses him a simple question, “Bruce, how many push-ups can you do?” Bruce Lee rubs his chin for a second (as he deeply ponders the question) and then turns to Chuck with his answer… “All of them!”, he says.
Alright ladies and gents, all joking aside… I had an idea to do a series of blog posts on how to make your own workout equipment! This weekend, I made some wooden push-up bars out of leftover scrap wood and thought you might like to know how to make yourself a pair.
If you plan to Unleash Your Ultimate Potential, you’ve gots to keep pushing on and pushing up!!! 😉
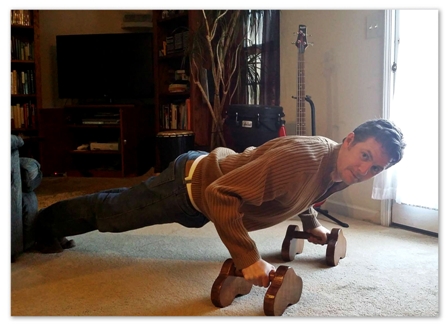
I’m breaking this down into 10 Easy Steps and if you follow the plan closely, by the end, you will wind up with your very own, high quality push-up bars for little to no moolah. In fact, the ones featured above cost me absolutely nothing since I had the scrap wood and all of the materials on hand.
Now, this may or may not be the case for you… So, let’s start with a list of the materials and tools you’ll need if you want to make a pair of these wooden push-up bars.
List of Materials:
- Roughly 2 feet of a leftover 2″X10″ piece of Pinewood
- 16-20 inches of a leftover wooden dowel
- 1 piece of paper or cardboard for a template
- Wood Glue
- Stain and/or Polyurethane
Tools you may need:
- Jigsaw
- Sander and 100 grit sand paper
- Forstner or Spade bit (ideally the same size as the wooden dowel)
- 1/2″ chisel (if your bit is not the same size as the wooden dowel)
- Hammer
- Tape measure or ruler
- Scissors
- Pencil or Pen
- Paint brush
Do you have all of that? If so, LET’S DO THIS THING!
If NOT, you’re gonna have to make a little trip on down to the local hardware store. Go on, we’ll wait for ya! lol
By the way, if you need to see any of the finer details, you can click on any of the below pictures to enlarge them.
Step 1: Design Your Template and Trace Out the Four End Pieces
First things first, you’ll need to design your template for the end pieces of the push-up bars.
Ultimately, it can be whatever shape you’d like (as long it’s a fairly stable one).
I used a small dish (about the diameter of a coffee cup) to trace 3 interlooping circles within a 6″X9″ rectangular area.
Use your scissors to cut out the completed template and trace the template four times onto your 2″x10″ piece of pinewood.
You can save some wood and a couple cuts if you stack the templates one on top of the other. If ya know what I mean!
Step 2: Use a Jig Saw to Cut Those Suckas Out
Once you’ve traced the patterns onto your wood you’ll carefully use your jig saw to cut out the four end pieces.
Use something to elevate the wood off of the ground so you can make the cuts. I simply used an old cardboard box.
Although, you might be lucky enough to have a wood working platform or table to use!
Make sure to hold the saw firmly, go slow, and closely follow the lines of the template. Any minor mistakes can be corrected when it comes time to sand them down.
So don’t be too meticulous!
Step 3: Use a Forstner Bit to Bore Out the Hole for the Handle.
Ideally, you will use a Forstner or spade bit that is the same diameter of the handle.
In this case, simply bore out the hole for the handle and then you can skip to step five.
I used a piece of tape to mark the depth I needed to go on the spade bit. Then bored the holes half way through the 2″X10″.
If you don’t have the ideal bit, use a smaller one and see step four!
Step 4: Chisel Out the Hole to the Correct Size of the Handle
I didn’t have the correct size bit, so I used a 1″ spade to bore the holes half way through the 2″X10″.
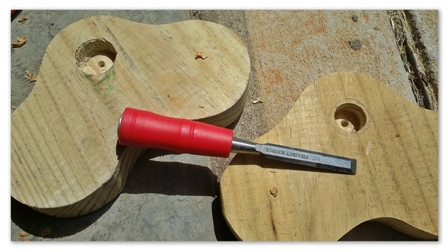
Then I had to use a chisel to remove the rest of the wood; creating the proper diameter for the handle to fit.
This took me a little bit of extra time to hammer and chisel out the proper diameter. After I got close, I took a piece of 100 grit sand paper to smooth the inside of the holes a little bit.
Finally, I lightly tapped in the dowels using my hammer. I didn’t hammer them all the way in, just enough to test if the handles would fit.
Step 5: Sand Them Down Smooth and Round the Edges
You’ll want your push-up bars to be nice and smooth! So the next step is to use a few pieces of 100 grit sandpaper to sand them down.
I used a little palm held sander and smoothed the faces of the end pieces. Then I turned my attention to the sides to get nice round and smooth circles.
Finally, I spent some time rounding the edges, so I had no sharp corners. Oh yeah, remember to sand down the handles too!
Step 6: Use Wood Glue to Secure the Handles to the End Pieces
Now there’s a few ways I could have secured the handles into place; nails, screws, or glue!
I opted for wood glue, mainly for aesthetic purposes, as I didn’t want an unsightly nail or screw messing up that purty wood grain finish.
In this scenario, the handles are inserted halfway inside the end pieces, and that’s what’s actually supporting your weight.
The glue is just keeping everything together!
Step 7: Apply a Finish to Make Them Look Extra Pretty
This is an optional step! You might like the unfinished wood grain, which does look nice by itself. Plus, being unfinished wood, it would provide the added benefit of absorbing sweat from your hands.
Personally, I’m not a heavy sweater and I love stained wood! On top of that, I just happened to have an unopened container of Minwax.
Normally, it is a two step process; first one would stain it, and then finish it with polyurethane if desired. Here I used a one step walnut stain and polyurethane combo.
Step 8: Allow Them to Dry Before Putting Them on the Carpet!
Okay, now this is a very important step! You’ll want to let them fully dry before playing with them or putting them on the carpet.
In theory, this step seems easy. Although, it sure was hard to resist wanting to test them out for six hours while the stain/polyurethane dried.
Overall, I thought they turned out really nice (despite a few runs and imperfections).
Step 9: Assume a Proper Push-up Position
Alright, they have finally dried! Now it’s time to push-up or shut-up. lol
One of the great things about push-up handles is that they can be easier on your wrists than having your hands on the floor.
You can choose many different ways and angles to position them. For starters, a neutral grip is a safe, strong, and stable position to do push-ups.
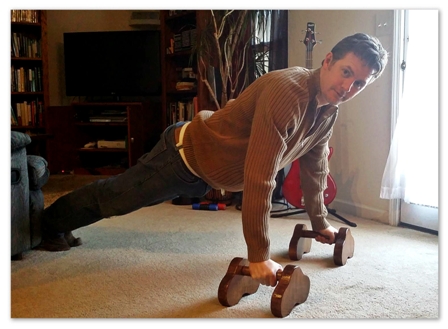
Set the handles about shoulder-width apart. Grip the handles and support your bodyweight over your hands. Now contract your glutes, abs, legs, and lats.
Get everything tight and notice the straight line from my head, upper back, butt and down my legs. This is your starting position!
Step 10: Do All of Your Push-ups just like Bruce Lee
Maintain the tight, plank-like position and from there lower yourself down (slowly and under full control) by allowing your arms to bend to your sides.
It is safer and stronger to keep your arms closer to your body (within a 0-60 degree angle) rather than flaring your elbows way out to 90 degrees.
Once you’ve lowered yourself as far as you can, simply reverse the motion using the muscles in your triceps, shoulders and chest to push yourself back up.
Enjoy hours and hours of push-up fun and other exercises! 😀
How to Make Wooden Push-up Bars like an ol’ Pro!
There you have it folks; 10 easy steps to make yourself a pair of wooden push-up bars!
I took my pair to the office and use them to as a part of my strength/mobility program to counteract the hours of sitting I do every day. The bars work great for a variety of push-ups, planks or planche holds, L-sits, hand-stands and whatever other exercises you can do or come up with… but we’ll save that for another article!
Here’s a quick summary of the 10 steps:
- Step 1: Design your template for the end pieces
- Step 2: Use a Jig Saw to cut out the end pieces
- Step 3: Bore out the holes for the handles
- Step 4: Use a chisel to achieve the correct diameter hole
- Step 5: Sand the end pieces and the handles
- Step 6: Glue the handles and end pieces together
- Step 7: Stain and Polyurethane to complete the finish
- Step 8: Allow them to dry fully before touching them
- Step 9: Assume a proper push-up position
- Step 10: Do lots of push-ups until you become a bad-ass
Well, my friend, I hope I covered everything in enough detail for you to plan and build yourself a pair of these push-up bars. If not, please leave any questions or comments you may have for me down below.
Really you could knock these out in 5-6 steps if you have the correct spade bit, skip the finish, and already know how to do push-ups! BAM – Now get to it…
And if you’re still not inspired to make a pair of these wooden push-up bars…. well, I don’t think I can help you. However, maybe this old picture of Bruce Lee doing his famous ‘two-finger push-up’ will!!! If not, maybe you should take up knitting! lol
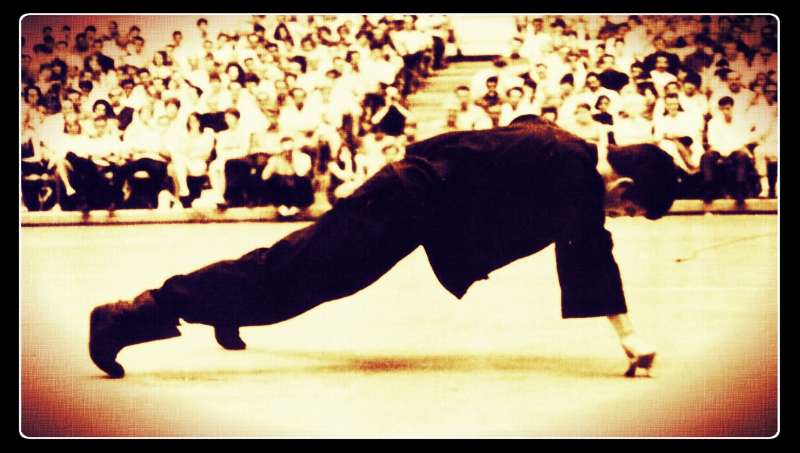
Eventually, you can just use two fingers like Bruce Lee!




Thanks bro… I had an idea but it got better with this post…
You’re welcome, Joe! Hope they turned out great 🙂